Wednesday, September 5, 2012

I'm back and it's Marathon Madness!

It's been a while and for that I apologise........but I have many awesome recipes to share with you as well as my trip back home to my motherland...the UK. I'm also training for my first marathon....so have been writing a lot of recipes and testing too....but trying not to eat the goodies myself!

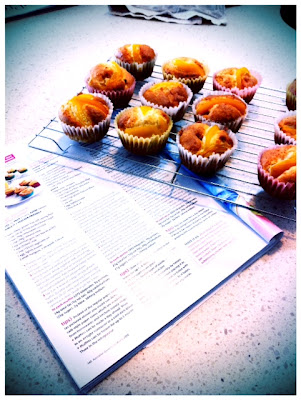
Where to start...well today I've whipped up a batch of gluten free muffins that I found in an old issue of Australian BBC Good Food Magazine. 


They are simply divine and so simple to make. I am heralding Healtherie's Gluten Free Baking mix as the best gluten free baking mix I have ever used...I've tried quite a few from the US Bob's Red Mill to the British organic Dove's farm. But hands down, this is impressive - just replace it as you would normal flour within a recipe and just make sure your baking powder is gluten free! Easy as that! Scroll down for the recipe...you won't be disappointed.


I also use it to make crumble toppings with some Gluten Free Oats I found in Waitrose in the UK - I wish that store was here - how I miss it so!


A friend asked me to make some 1st birthday cupcakes for a special little lady.... here they are.


I'll be back next week with a great new product that's just been launched in NZ supermarkets and I'll also tell you how to use it!

Have a great week! TPB X

MANGO, ALMOND & COCONUT MUFFINS


Makes 12-16

Prep 20 minutes
Cook 30 minutes

GLUTEN FREE

FREEZER FREINDLY

2 cups gluten free flour mix (Healtheries)

2/3 cup caster sugar
1/4 cup desiccated coconut
70g almond meal
1 cup trim milk
1/2 cup vegetable oil
1 egg, lightly beaten
2 small mangoes, 1 chopped, 1 sliced (I used 1 can mango slices in syrup and drained them)


  1. Preheat oven to 170 degrees celsius fan bake. Line a 12 hole muffin pan with cases.
  2. Combine all the dry ingredients in a bowl and stir well. Combine wet ingredients in a jug and whisk together lightly. Pour into bowl and stir until combined. Be careful not to over mix. Add the chopped mango and mix again.
  3. Pour into cases and layer with sliced mango on top. Place into oven for 25-30 minutes until golden brown on top. If desired, sprinkle with a little icing sugar when cooled.


HEALTHY FOOD GUIDE MAKE OVER MUESLI SLICE - JULY 2012 
http://www.healthyfood.co.nz


Makes 32 bars
Prep 15 minutes
Cook 20-25 minutes

FREEZER FRIENDLY 

Spray oil
3 cups rolled oats
½ cup sunflower seeds
¼ cup sesame seeds
¼ cup dried cranberries
¼ cup prunes, chopped
¼ cup linseeds
110g reduced fat spread
1 x 400g tin lite sweetened condensed milk
1 tablespoon light peanut butter
2 tablespoons runny honey


  1. Heat oven to 170°c. Grease and line a 30cm x 21cm bake tray. In a large bowl combine all dry ingredients and mix well to combine.
  2. Place a small heavy based pan on a low heat, melt the spread, condensed milk, peanut butter and honey. Carefully stir until melted, simmer for 1-2 minutes until it begins to thicken.
  3. Pour the melted mixture into the bowl on top of the oat mixture. Stir well until combined.
  4. Press into prepared tray and bake for 20-25 minutes until golden on top. Remove from oven and set aside to cool.
  5. Once cooled, remove from tray and using a sharp knife, cut into squares.

Variations
  • Banana & choc chip – add ½ cup extra oats to dry mixture. Once all is combined, fold through ½ cup mashed banana & 1/3 cup dark chocolate chips.
  • Fruit & nut – Replace sunflower and sesame seeds with chopped nuts and replace the prunes with sultanas.

What we changed from original full fat recipe from http://www.taste.com.au
  •      Swapped butter for reduced fat spread
  •      Reduced honey
  •      Reduced peanut butter
  •      Removed sugar
  •      Swapped toasted muesli for rolled oats


Friday, March 23, 2012

A moment on the lips....


Hello, I’m back! Sorry for the lack of blog post for the past 3 months, summer has been less than average in NZ, but there are brighter days ahead!

Over the past few months I’ve been experimenting with a lot of new ingredients, products etc and I’ll show you these via blog, recipes and images over the next few blog extracts. I've been traveling up to the far north of NZ, the first time ever north of Keri Keri - wow, amazing. The places we visited took my breath away. See below and you'll know what I'm talking about! 90 Mile Beach is stunning and our puppy, Cobain loved her first time on the beach. We also tasted some fantastic smoked fish - an every day staple for those who live by the sea, but a rare luxury for us city kids!


The beautiful green feijoa season is nearly upon us…..again!! Having just purchased an ice cream maker (thanks Mr Fly Buys!) I have yet to test it, but on the list is a definite experimentation with feijoas and creamy vanilla goodness! Keep your eyes peeled!

I’ve been doing quite a lot of writing for Healthy Food Guide NZ and recently found out that some of my recipes have been published within the UK HFG! Very exciting, one was even on the front cover! So over the next couple of blog entries I’ll be sharing these with you. Healthy Food Guide has also just launched a brand new website www.healthyfood.co.nz - it looks fabulous and is so easy to use.

It's also been wedding season - there will be an up and coming blog on this soon!


Anyway enough babbling and onto the recipes...

Until next time – enjoy!

TPB X


THE FIRST 2 RECIPES USE A 30 cm X 21cm SIZE BAKE TRAY

Apple & Boysenberry gluten free bake 

Time to make: 35-40 minutes
Makes: 15 slices

125g reduced fat spread
1/2 cup caster sugar
2 eggs, lightly beaten
1 teaspoon vanilla essence
1 cup Healtheries Gluten Free Baking mix
1 teaspoon gluten free baking powder
1/2 cup mashed banana
1 & 1/2 cups cooked apple, cubed
1 cup boysenberries, frozen or canned (if canned, drain beforehand)

1. Pre-heat oven to 180oC. Lightly spray a bake tray with spray oil.
2. In a large bowl, beat spread and sugar until light and creamy. Lightly beat in  egg. Mix in remaining ingredients (except boysenberries) until well combined.
3. Fold through boysenberries and pour into pre-greased bake tray.
4. Place into oven for 40-45 minutes until well-risen and golden brown. Remove from oven and allow to cool, then slice.
Step 5 Dust with icing sugar before serving, if desired.
Step 6 Will keep in an airtight container for up to 3 days. Freezes well.

Coconut Chocolate Crunch

This has become my new favourite slice…..I could polish it off in one. That’s not good for my hips, but live a little!

Time to make: 20 minutes (plus 1-2 hours chilling)
Makes: 32 pieces

1 cup dark chocolate melts
400g tin lite sweetened condensed milk
1/2 cup sultanas
1/4 cup dried apricots, roughly chopped
300g malt biscuits, crushed
2 tablespoons desiccated coconut, for topping 

1. Lightly spray a bake tray with spray oil. Place the chocolate and condensed milk in a bowl over a small pan of hot water. Heat through and stir continuously until melted. Remove from heat and set aside.
2. In a large bowl, combine remaining ingredients and mix well. Pour melted chocolate mix on to dry ingredients and mix until well combined.
3. Pour into bake tray and sprinkle with coconut. Refrigerate for 1-2 hours until set.
4. When ready to slice, use a sharp knife dipped in hot water. Keeps for up to a week refrigerated in an airtight container.

TIP – make it gluten free by using gluten free biscuits.


Banana, coconut & blueberry gluten free muffins

Makes: 12 muffins
Time to make: 35 minutes (including 10 minutes prep)

100g reduced fat spread
1/2 cup caster sugar
1 teaspoon vanilla essence
1 egg, lightly beaten
1/2 teaspoon baking powder
1 cup Healtheries gluten free baking mix
1 cup banana, mashed
1/3 cup desiccated coconut
1 cup frozen blueberries

1. Heat oven to 180oC. Line a 12 hole baking tray with paper muffin cases.
2.  In a large bowl or mixer combine reduced fat spread and sugar, beating well until fluffy and light in colour.
3. Add remaining ingredients, beating well with each addition.
4. Carefully fold through the blueberries and divide amongst the muffin cases. Bake for 20-25 minutes until golden and well risen.
5. Store in an airtight container for up to 2 days or place into a resealable bag and freeze for up to a month.